Mood:
Topic: finished project
Posted by chrisdfriend
at 8:10 AM EST

| « | February 2008 | » | ||||
| S | M | T | W | T | F | S |
| 1 | 2 | |||||
| 3 | 4 | 5 | 6 | 7 | 8 | 9 |
| 10 | 11 | 12 | 13 | 14 | 15 | 16 |
| 17 | 18 | 19 | 20 | 21 | 22 | 23 |
| 24 | 25 | 26 | 27 | 28 | 29 | |
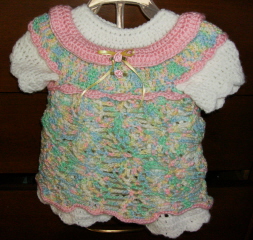
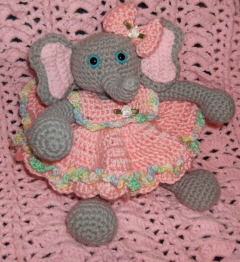
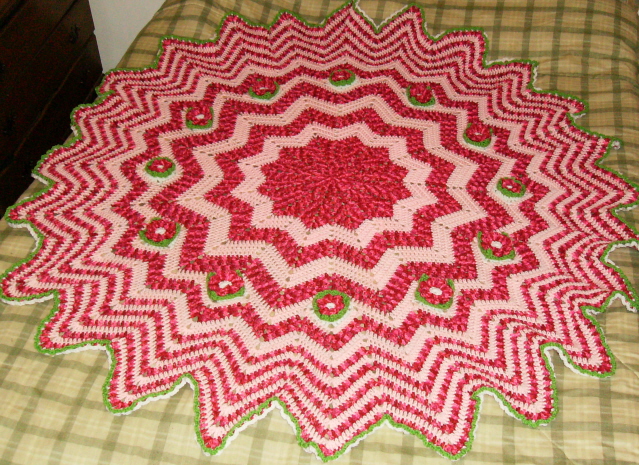
I just finished this baby blanket!
![]()
![]()
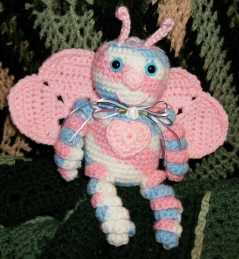
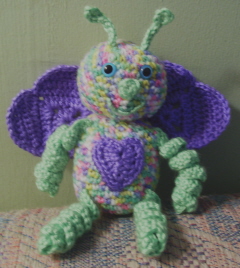
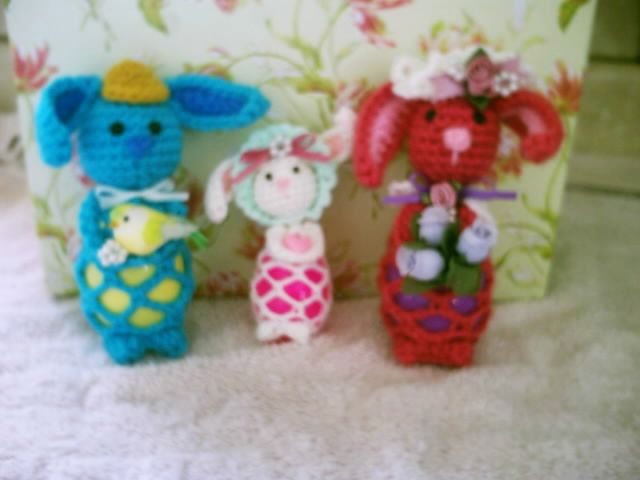
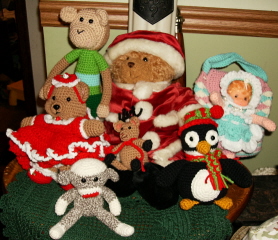 Toys for donation!
Here's my newest round ripple! It's a Christmas present for my MIL's sister!
Here are some hat patterns for The Egg Bunny Kids!
Baseball cap~F hook & small amount of yarn
Rnd 1) ch 2, 5 sc in 2nd ch from hook, join , ch 1 (5 sc)
Rnd 2) 2 sc in each st around, join, ch 1 (10 sc)
Rnd 3) sc in 1st st, 2sc in next st, (sc in next st, 2 sc in next st) repeat around, join, ch 1 (15 sc)
Brim of hat~ sc,hdc in 1st st, 2 dc in each of next 2 sts, hdc,sc in next st, sl st in next stitch. Fasten off! Glue or sew hat on bunnies head!~
Girl Hat~F Hook, small amount of yarn, trims
Rnd 1) ch 2, 6 sc in 2nd chain from hook, join, ch 1. (6 sc)
Rnd 2) 2sc in each st around, join, ch 1. (12 sc)
Rnd 3) working in back loops only, sc in each st around, join, ch 1. (12 sc)
Rnd 4) sc in each st around, join, ch 2. (12 sc)
Rnd 5) working in front loops only, 3 dc in each st around, join, ch 1. (36 dc)
Rnd 6)* sc, ch 3, skip next st* repeat from * to * around, join, fasten off.
Fold front of brim up and and attach trim.
Glue or sew hat onto bunnies head.
Baby bunny~ use same pattern as for the others, but use a C hook and baby yarn.
Baby bonnet~ B hook & small amount of baby yarn, trims.
Rnd 1) ch 2, 6 sc in 2nd ch from hook, join, ch 1 (6 sc)
Rnd 2) 2 sc in each st around, join , ch 1 (12 sc)
Rnd 3) 2 sc in 1st st, 1 sc in next st, (2 sc in next st, 1 sc in next st) repeat around, join,,ch 2 & turn. (18 sc)
**Now working in rows!
Row 4) Back loops only for this row, Dc in 15 st, ch 2 & turn (15 dc)
Row 5) dc in first 3 sts, ch 3, skip next 2 sts, dc in next 5 sts, ch 3, skip next 2 sts, dc in last 3 sts, ch 1 , turn (11 dc, 2 ch 3 spaces)
Row 6) sc in 1st st, (ch 3, sc in next st) repeat across.ch 1
do not turn work around bottom of bonnet from front to back
Bottom trim~ working across side of rows, 2 sc in end of each dc row, sc in each of 3 skipped sc of back, 2 sc in end of each dc row, join to first sc of row 6.
for chin strap~ place bonnet on bunny and pull ears through the holes in bonnet, ch 5 and sl st into opposite front of bonnet, fasten off Add trims as desired!
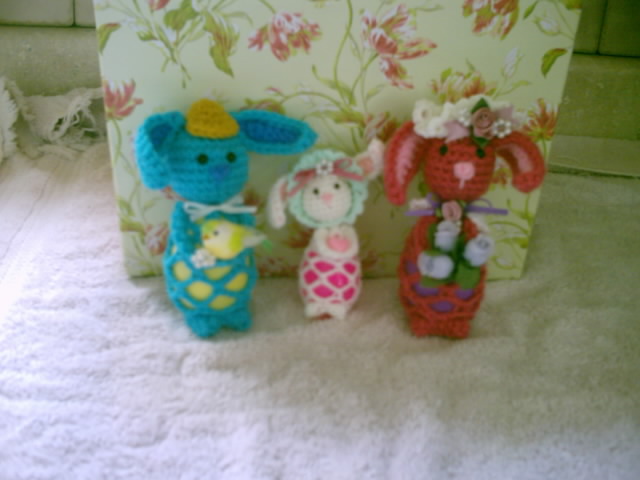
Egg Bunny Kids! Basic bunny
Materials:
worsted weight yarn-small amount of 2 colors (1 for main bunny & 1 for inner ears and nose)
1 medium size plastic Easter egg
2 small animal eyes or black beads, or embroider them on with black yarn or floss
ribbon and whatever other trims you want
pom pom for tail- I used the sparkly white ones
stuffing for the head
F hook and yarn needle for sewing
Nose~with nose color, ch 2, sc in 2nd ch from hook, fasten off leaving long enough tail to sew mouth.
Head & body~
Rnd 1) ch 2, 5sc in2nd ch from hook, join, ch 1 (5sc)
Rnd 2) 2 sc in each st around, join, ch 1 (10 sc)
Rnd 3) *2 sc in 1st st, 1 sc in next st* repeat from * to * around, join, ch1 (15 sc)
Rnd 4) *2 sc in !st st, 1 sc in each of next 2 sts* repeat from * to * around, join, ch 1 (20 sc)
Rnds 5-8) sc in each st around, join, ch 1 (20 sc)
**attach eyes now on round 5 about 1/2 inch apart, attach nose on round 6 between eyes, sew a straight line down from nose for mouth.
Rnd 9) sc in 1st 2 sts,* decrese over next 2 sts, sc in next 2 sts* repeat from * to * around, join, ch 1 (15 sts)
**stuff head firmly!
Rnd 10) *sc in 1 st, decrease in next 2 sts* repeat from * to * around, join, ch 1 (10 sts)
Rnd 11) sc in 1st 2 sts, (decrease over 2 sts) 4 times, join, ch 1 (6 sts)
Rnd 12) sc in each st around, join, ch 1 (6 sc) ~neck
Rnd 13) 2 sc in each st around, join, ch 1 (12 sc)
Rnd 14) sc in first st, chain 3,* skip 1 st, sc in next st , chain 3 *, repeat from * to * around, join (6 sc, 6 ch 3 spaces)
Rnds 15-17) sl st into 1st ch3 space, ch 1,* sc in space, ch 3* repeat from * to * around, join.
Rnds 18- 19) sl st in 1st chain space, ch 1, *sc in space, ch 4* repeat from * to * around, join.
**insert egg now
Rnd 20) repeat rnd 15
Rnd 21) just like last round except ch 2 instead of ch 3
Rnd 22) ch 1, sc in 1st st, ch1, 4 dc popcorn in next ch 2 space, ch 1, sc in next sc, 2 sc in each of next 4 ch spaces,sc in next sc, ch 1, 4 dc popcorn in next ch 2 space, ch 1 join.
fasten off and weave in end.
Arms~ ch 17, sc in 2nd ch from hook, sc in next 3 ch, hdc in next ch, dc in next ch, hdc in next ch, slip st in next 2 chs, hdc in next ch, dc in next ch, hdc in next ch, sc in last 4 chs. fasten off leaving long enough tail to sew onto body right below neck.
Inner ear~ make 2 ) ch 10, sl st in 1st ch from hook, sc in next ch, hdc in next 2 chs, dc in next 4 chs, hdc in next ch, sc in last ch, fasten off.
Outter ear~ make 2
row 1) repeat inner ear, don't fasten off, ch 1 turn.
row 2 joining) hold the inner and outter ear wrong sides together and work throu both layers, sc in first 9 sts, 3sc in end of ear, sc in next 9 sts . ch 1
row 3) fold top of ear in half length-wise and make 3 sc across top of ear through both layers.fasten off leaving end long enough to sew ears to head between rounds2 & 3 of head.
glue pom pom on the back side for tail.
add ribbons, flowers or other trims.
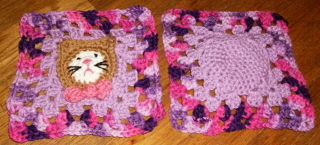
Kitten Square ! Please leave a comment if you take this pattern! Thank you!
7 inch square!
Christal Friend - October 2007 chrisdfriend@aol.com
H hook
yarn needle
yarn : worsted weight, CA: center cat face, CB: main cat color, CC: Bow color, CD: square main color, CE: border color, black & pink - small amounts to embroider face
Center of face- CA
1) Ch 2, 6 sc in 2nd ch from hook. Join, ch 1 (6)
2) 2 sc in each st around. Join, ch 1 (12)
3) (sc, 2sc in next st) repeat around. Join, ch 1 (18) Fasten off.
Head & Ears - CB
1) BLO-Join with sl st in any st, sc in same st, sc in next st, 2 sc in next st, (sc in next 2 sts, 2sc in next st) repeat around. Join, ch 1 (24)
2) (Sc in the next 3 sts, 2 sc in the next st) repeat around. Join, ch 1 (30)
3) FLO- Sc in the 1st 9 sts, ( hdc, dc,trc in next st), (dc, hdc in next st), sc in next 4 sts, (hdc,dc in next st), (trc, dc, hdc in next st), sc in next 9 sts. Leave last 4 sts unworked for bow to be made later! Fasten off! Embroider face on cat now!
Main square - CD
1-3) Same as center of face but don't fasten off!
4-5) Same as 1-2 of head and ears!
6) BLO of round 2 of head! Holding cat head on top of main square, working through both layers! Starting in the loop behind 1st sc on R3 of head. ( Sc in 4 sts, 2 sc in next st) repeat around . Join (36)
7) Slip st in next st, Ch 3 (2 dc, ch 2, 3 dc in same st), skip 2 sts, sc in the next 4 sts, skip 2 sts, * ( 3 dc, ch 2, 3dc in next st), skip 2, sc in next 4 sts, skip 2* repeat from ** twice more. Join.
8) Sl st to corner ch space, Ch 3, 2 dc, ch 3, 3 dc in corner ch space), ch 1, (3 dc in next space between corner & 4 sc sides, ch 1) twice, * (3dc, ch3, 3dc, ch 1 in corner ch) (3 dc in next space between corner & 4 sc sides, ch 1) twice*, repeat from ** around. Join. Fasten off!
Border-CE
1 -2) Sl st to corner ch 3, (ch 3, 2 dc, ch 3, 3 dc) in ch space, ( ch 1, 3dc in next ch 1 space across to corner) ch 1, * (3 dc, ch 3, 3 dc) in corner ch space, ch 1, ( 3 dc in next ch 1 space, ch 1 across to corner)* repeat from ** around. Join and Fasten off!
Bow-CC
Working in 4 remaining front loops of round 2 of head! Sl st in 1st loop, chain 3, 2 dc in same loop, ch 3, sl st in same loop, work 2 dc in each of next 2 loops, remove loop from hook and pull it through 1st of these 4 dc,( popcorn made for bow center) sl st in last loop, chain 3, 2 dc in same loop, ch 3 sl st in same loop. Fasten Off!
Hope you enjoy this pattern!
